If you have ever tried to get video and email working together, you may have come across a common problem: it can be a total nightmare.
That said, the gain is definitely worth the pain, as the following stats from the “Web Video Marketing Council” demonstrate:
- A vast majority of senior marketing executives—88%—report that email with integrated video improves campaign performance.
- A smaller, though still sizable, majority of 76% say these campaigns generate high click-through rates.
- Finally, 72% say “prospects are more likely to make a purchase or take other desired actions after viewing video content sent via email.”
So how do you do it?

Wistia and MailChimp work brilliantly together to create effective and informative video email campaigns
In Email Campaigns
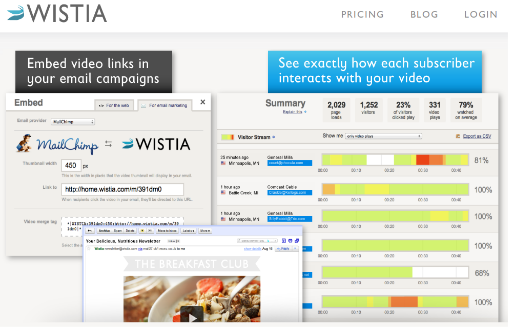
If you want to use video in an email marketing campaign I recommend setting up a free account with Wistia. Once that’s done, you can link to the video using free email marketing services like MailChimp. The service automatically creates a clickable thumbnail image within the emails that customers can follow. Even better Wistia tells you which email addresses clicked on the video, how long they watched it for and what content is engaging people most.
Nice!
In Regular Emails
If you just want to include a video in the regular footer of your emails, there are myriads of options, but if you’re looking for the quick, easy and reliable option, trust me when I say the step-by-step instructions below are for you:
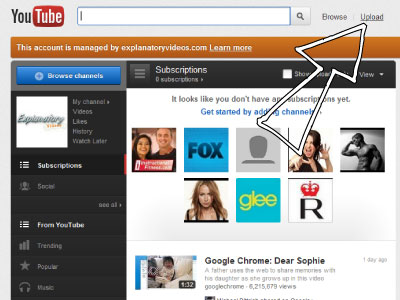
1. Create a free account with Wistia or YouTube and follow the easy step by step instructions for uploading your video.

Step. 1
2. Once your video is uploaded, go to the page where it is located. You want to find a frame in the video that you can use as a thumbnail, so play the video until you get to a nice image, pause the video.
3. Now press Ctrl+PrtScn (possibly Fn+PrtSc on some systems) to capture an image of your current screen.

Step. 3
4. If using Microsoft Windows, open the Paint application. If using another system, a simple image editing software will do the same job.
5. Once your editing application is open, press Ctrl+V to paste the screen image into the application.

Step 5
6. Using the selection tool, draw a box around the video and then select “crop” to remove all the unnecessary graphics.

Step 4
7. Select the image again and use the “Resize” option to shrink it down to around 175px width (make sure “maintain aspect ratio” is selected).

Step 7
8. Click the following link. Once opened, select “file” and then “download” to download the play button image: https://docs.google.com/open?id=0BzuKMNT1B7AiZjlZVWZXZjlNWHM
9. Once you have downloaded the file, select “paste from…” in your Paint application and insert the play button image. Once the image is inserted, drag it into position in the middle of your video thumbnail.

Step. 9
10. Once you are happy with the look of your thumbnail, click “file” and then “save as…” and save the file as a jpeg (.jpg) file.
11. Open your email client and compose a new email. Paste the image you created into the email. Select the image and add a hyperlink which links to the YouTube page your video is hosted on. (Tip: Don’t forget to add “alternate text” which will be displayed even if your image is blocked).

Step 11
12. Send your email! You can also paste the image and hyperlink into your email footer meaning every email you send is promoting your video.

Step 12
Kenny Simpson is a Creative Producer at ExplanatoryVideos.com
If you would like to have an explainer video produced or would like more information, click here to drop us a line and get a FREE CONSULTATION and QUOTE.


